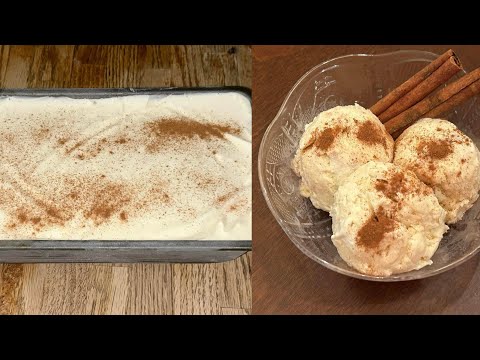
Skip the Store: Make Your Own Luxurious Eggnog Ice Cream Today
Forget the seasonal rush and the limited availability of store-bought holiday treats. Imagine indulging in the rich, creamy, and distinct flavor of eggnog, transformed into a velvety ice cream that you can enjoy any time of year. This isn't just any dessert; it's a homemade masterpiece that marries the warmth of classic eggnog spices with the cool indulgence of premium ice cream. And the best part? Creating your own batch of the
easiest eggnog ice cream is simpler than you think, promising a luxurious experience that tastes far more complex than its preparation suggests.
No longer confined to the winter months, this festive delight brings the spirit of the holidays to your palate with every spoonful. From the subtle dance of nutmeg and vanilla to the optional hint of spiced rum, this dessert is a testament to the fact that some of the most extraordinary treats are born right in your own kitchen. Let's dive into how you can bring this dreamy, frozen delight to life today.
Why Homemade Eggnog Ice Cream is a Game Changer
There’s a certain magic that happens when you churn your own ice cream, and with eggnog, that magic is amplified. While there are many delicious eggnog-based desserts, eggnog ice cream stands in a league of its own. It’s more than just a sweet treat; it’s an experience. The rich, spiced, and optionally boozy notes of traditional eggnog translate beautifully into a cold, smooth confection. When you hear "eggnog," you might think of a thick, drinkable custard – and you'd be right! Eggnog at its heart is a cooked custard, which naturally lends itself to creating an incredibly smooth and luscious ice cream base.
The beauty of making your own is the unparalleled freshness and control over ingredients. You dictate the quality, the spice level, and whether it’s a boozy adult treat or a delightful dessert for the whole family. Unlike commercial versions that pop up briefly and disappear, your homemade creation can be enjoyed year-round, turning any ordinary day into a festive occasion. This truly is the
easiest eggnog ice cream to make, and the taste difference is profound – a creamy, dreamy texture with genuine flavor notes that are simply unmatched.
Crafting Your Creamy Custard Base: The Secret to Success
The foundation of any exceptional ice cream is its base, and for eggnog ice cream, that means a smooth, rich custard. Don't let the word "custard" intimidate you; it's a straightforward process that is key to achieving that desirable silky texture.
Let's look at the core ingredients that make this possible:
*
Whole Milk & Heavy Cream: These are the pillars of creaminess. While you can opt for 2% milk or half-and-half for a lighter version, be prepared for a slightly less rich and creamy result. For that truly luxurious mouthfeel, heavy cream is non-negotiable.
*
Granulated Sugar: Essential for sweetness. Experiment with brown sugar for a deeper, more caramel-like undertone, or use a sugar substitute if you're mindful of sugar intake.
*
Egg Yolks: These are the unsung heroes, responsible for the silky texture and richness of the custard. They act as a natural emulsifier and thickener. If eggs are a concern, cornstarch can be used as a thickener, but it won't replicate the exact lusciousness and mouthfeel that egg yolks provide.
*
Store-bought Eggnog: This is where the core flavor comes from. Using a good quality, flavorful eggnog will elevate your ice cream significantly. Feel free to make your own eggnog from scratch if you're feeling adventurous, but a good store-bought option keeps this process quick and simple, making it the
easiest guide to rich, creamy homemade eggnog ice cream possible.
*
Nutmeg: The quintessential holiday spice. Freshly grated nutmeg offers an aromatic complexity that pre-ground simply can't match. If you don't have nutmeg, a pinch of cinnamon can be a nice substitute, though it will subtly alter the classic eggnog flavor profile.
The most crucial technique in preparing your custard base is
tempering the egg yolks. This step prevents the eggs from scrambling when introduced to the hot milk mixture. It involves slowly whisking a small amount of the hot liquid into the egg yolk mixture first, gradually raising the temperature of the yolks before adding them back to the main saucepan. This might sound intricate, but it’s a simple, mindful step that guarantees a smooth, scramble-free custard. Take your time, whisk continuously, and you'll be rewarded with a perfectly velvety base.
Elevating Your Eggnog Experience: Serving Suggestions & Spirited Swirls
One of the greatest attributes of homemade eggnog ice cream is its incredible versatility. While it's utterly delicious on its own, it also serves as a phenomenal component in a myriad of other desserts, transforming them into something truly special.
Consider these delightful pairings:
*
Pecan Pie Perfection: A generous scoop melting atop a warm slice of pecan pie is an irresistible combination of textures and flavors.
*
Hot Chocolate Heaven: Drop a scoop into a mug of rich hot chocolate for an instant, creamy, and spiced upgrade.
*
Cookie Sandwiches: Sandwich it between soft pumpkin sugar cookies or gingerbread cookies for a festive and utterly charming dessert.
*
The Ultimate Affogato: For an even more luxurious, adult treat, pour a shot of hot, strong coffee over a scoop. The contrast of hot and cold, bitter and sweet, is simply divine.
*
Spirited Indulgence: Much like traditional eggnog, this ice cream welcomes a touch of "Christmas spirit." Spiced rum is the classic choice, adding a warming depth of flavor. However, feel free to experiment with brandy, bourbon, or even white rum to suit your personal preference. Add the alcohol after the custard has cooked and cooled slightly to ensure the spirits retain their full flavor. The amount is typically small, so while it adds character, it's not overpowering. For those who prefer to keep it non-alcoholic, rest assured that this ice cream is still wonderfully flavorful and delightful without the booze. This flexibility is what makes it so appealing, allowing you to
create versatile eggnog ice cream at home for any occasion.
Your Step-by-Step Guide to the Easiest Eggnog Ice Cream
Creating this luxurious treat is a journey of patience and simple steps, with most of the time spent waiting for the magic to happen in your fridge and freezer. Here’s a streamlined overview of the process:
1.
Prepare the Dairy Base: In a medium saucepan, gently combine your whole milk, heavy cream, and about half of your granulated sugar. Heat this mixture over medium heat, stirring occasionally, until it's steamy and warm to the touch, but not boiling.
2.
Whisk the Yolks: In a separate bowl, whisk together the egg yolks with the remaining granulated sugar until the mixture becomes pale and slightly thickened.
3.
Temper the Eggs: This is where care pays off. Slowly, in a thin stream, pour about a cup of the hot milk mixture into the egg yolk mixture while continuously whisking vigorously. This gradually raises the temperature of the yolks.
4.
Cook the Custard: Pour the tempered egg yolk mixture back into the saucepan with the remaining hot milk. Cook over medium-low heat, stirring constantly with a spatula, until the custard thickens enough to coat the back of a spoon. Do not let it boil.
5.
Infuse & Cool: Remove from heat and stir in your good quality store-bought eggnog, nutmeg, and any optional extracts like vanilla. If you're adding rum, you can add it now. Strain the custard through a fine-mesh sieve to catch any potential bits of cooked egg or spices, ensuring a perfectly smooth texture.
6.
Chill Thoroughly: Transfer the custard to an airtight container or cover it tightly with plastic wrap, pressing the wrap directly onto the surface to prevent a skin from forming. Chill in the refrigerator for at least 4 hours, or ideally overnight. This chilling step is crucial for the best ice cream texture and allows the flavors to meld beautifully.
7.
Churn and Freeze: Once thoroughly chilled, pour the mixture into your ice cream maker and churn according to the manufacturer's instructions. This usually takes about 20-30 minutes, resulting in soft-serve consistency.
8.
Firm Up: Transfer the churned ice cream to a freezer-safe container, cover, and freeze for at least another 4 hours to firm up to a scoopable consistency.
While the total time commitment from start to scoop can be around 8 hours, the active prep time is a mere 15-20 minutes. Most of the process involves patient waiting, making this truly the
easiest eggnog ice cream to fit into your schedule, especially when you plan ahead. The reward for your minimal effort is a dessert that feels incredibly gourmet and utterly satisfying.
Conclusion
Making your own luxurious eggnog ice cream is a rewarding culinary adventure that brings joy and flavor into your home, breaking free from seasonal constraints. With its rich, creamy texture and distinct spiced aroma, this homemade treat is a testament to the simple pleasures of creating something truly special. Whether you enjoy it plain, layered into another dessert, or with a spirited kick, you'll find that skipping the store for this homemade delight is a decision your taste buds will thank you for. So, gather your ingredients, follow these simple steps, and prepare to indulge in the absolute
easiest eggnog ice cream you've ever tasted. Enjoy the magic!